Showcase Finish Windows: The Definitive Guide to Removing Adhesive and Achieving Flawless Glass That Multiplies Natural Light


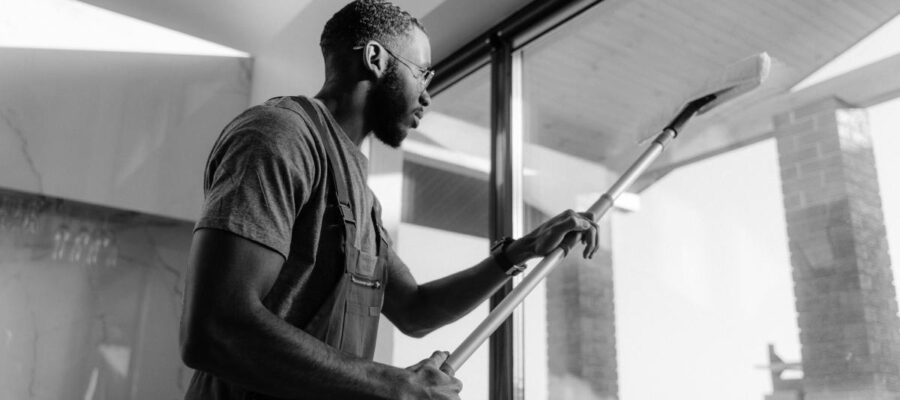
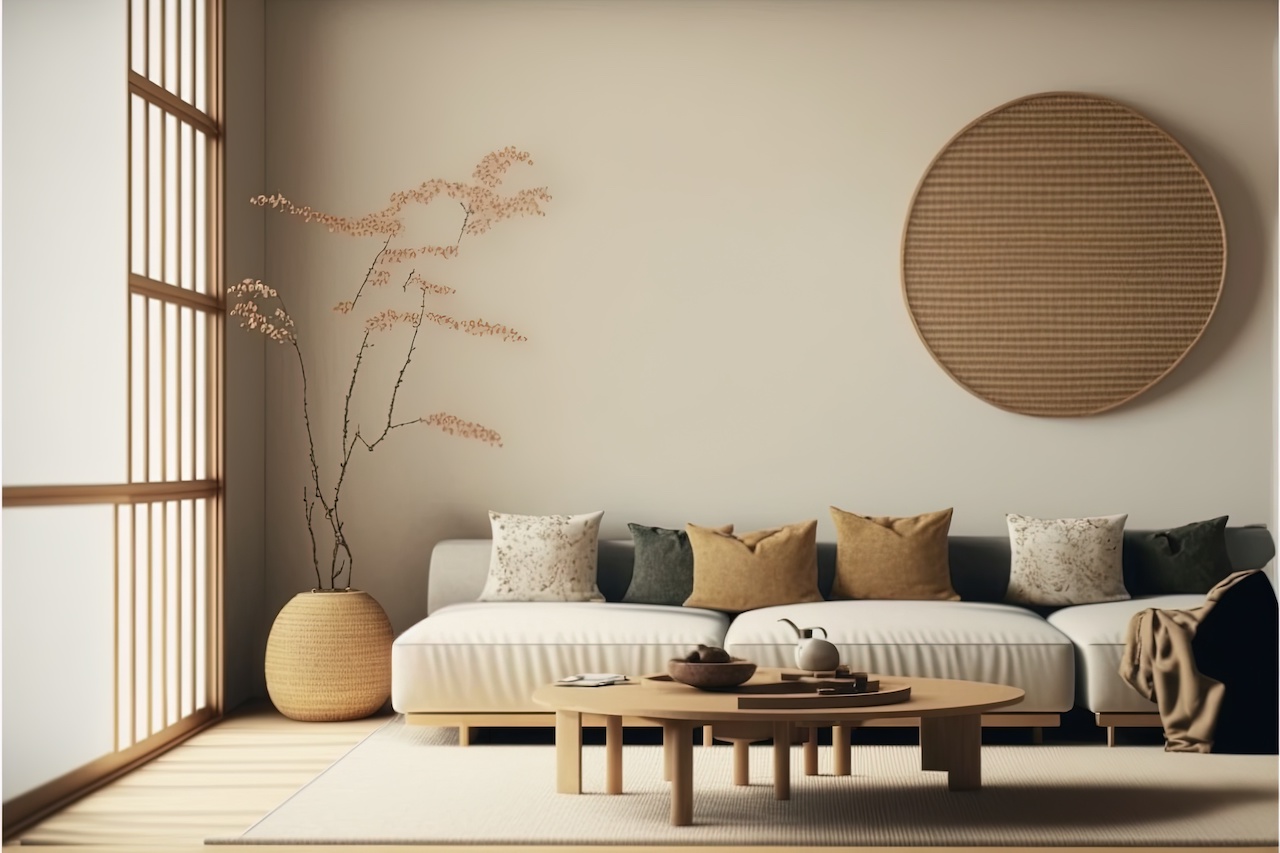
In interior design, windows are much more than mere openings: they frame the outside view and serve as the main channel for natural light—the most important element in any décor.

Yet that brilliance can be easily lost. Glue from old stickers, silicone residues after renovations, or painter’s tape remnants can ruin the aesthetic, creating unwanted shadows and reflections that detract from the elegance of your space. If you’re aiming for a showroom-like finish, where the glass seems invisible, proper maintenance is essential.

Removing adhesive residues from glass is often the trickiest step before achieving a professional clean. It’s not just a DIY task; it’s a decorative maintenance technique that requires patience and the right tools to avoid damaging the surface.

In this guide, we’ll reveal the secrets to handling every type of residue—from soft sticker glue to the toughest adhesives—and finish with professional techniques for a completely mark-free result.

The First Step in Design: Why Glue Ruins Aesthetics

Glass is a material that reveals every imperfection. Even the smallest adhesive residue can negatively affect your décor in several ways:

  • Light Distortion: Sunlight hitting the adhesive creates halos or shadows that alter the window’s shine. This effect is especially noticeable at sunset.

  • Dirt Accumulation: Residual glue forms a sticky surface that attracts and holds dust and lint, creating a gray “smudge” that traditional glass cleaners can’t remove.

  • Neglected Appearance: A clean, shiny window signals a well-maintained home. Adhesive remnants, even on freshly cleaned glass, give the impression of an incomplete or careless finish.

The Art of Removing Adhesive: Three Fundamental Techniques

The key is to understand that each type of adhesive requires a different approach. Always start with the gentlest method and progress as needed.

1. Thermal Method (For Soft Adhesives and Vinyls)
Many adhesives—especially vinyl stickers, decals, and tape—are thermoplastic, meaning they soften with heat.

  • Essential Tool: A hairdryer or, with caution, a heat gun on low power.

  • Process:

    1. Direct warm air onto the adhesive for 30–60 seconds. Move the heat slightly; don’t hold it in one spot.

    2. Immediately try to lift the residue with your fingernail or a microfiber cloth.

  • Decorative Benefit: Ideal for removing temporary decorations (seasonal vinyls, holiday stickers) without leaving marks.

2. Solvent Method (For Hard Adhesives and Old Tape)
When heat isn’t enough, a chemical agent can break down the glue without damaging the glass. While glass is resilient, take care with frames (PVC or painted wood).

  • Safe Household Agents:

    • Isopropyl Alcohol (or Rubbing Alcohol): Excellent for silicone residues, strong tape, or marker remnants. Evaporates quickly.

    • White Vinegar: Works well on label residues and limescale, leaving the glass shiny.

    • Vegetable Oil or Mayonnaise: For very old sticker residues; oil penetrates the adhesive bond.

    • Acetone (Nail Polish Remover): Very effective for super-strong adhesives or cyanoacrylate, but use with extreme caution. Apply only on the glass and avoid contact with plastic or painted frames.

  • Process:

    1. Soak a clean cloth or cotton pad with the chosen solvent.

    2. Press it onto the adhesive for 2–5 minutes to let the solvent work.

    3. Rub the area in circular motions with gentle pressure.

3. Mechanical or Scraping Method (For Hardened Residues)
For hardened glue or dried putty, physical removal is necessary—but always safely for the glass.

  • Essential Tool: A glass scraper with a razor blade or utility knife. Never use dry steel wool or abrasive sponges.

  • Professional Technique:

    1. Always wet the glass: Spray soapy water or glass cleaner over the adhesive to lubricate and minimize scratching.

    2. Correct Angle: Hold the blade very low (about 30–45°). Never scrape perpendicular to the glass.

    3. Movement: Apply firm, steady pressure, scraping in one direction until the adhesive lifts completely.

The Design Finish: Streak-Free Cleaning to Multiply Light

Once the adhesive is gone, the next challenge is achieving total transparency—that polished finish that lets light multiply across the room.

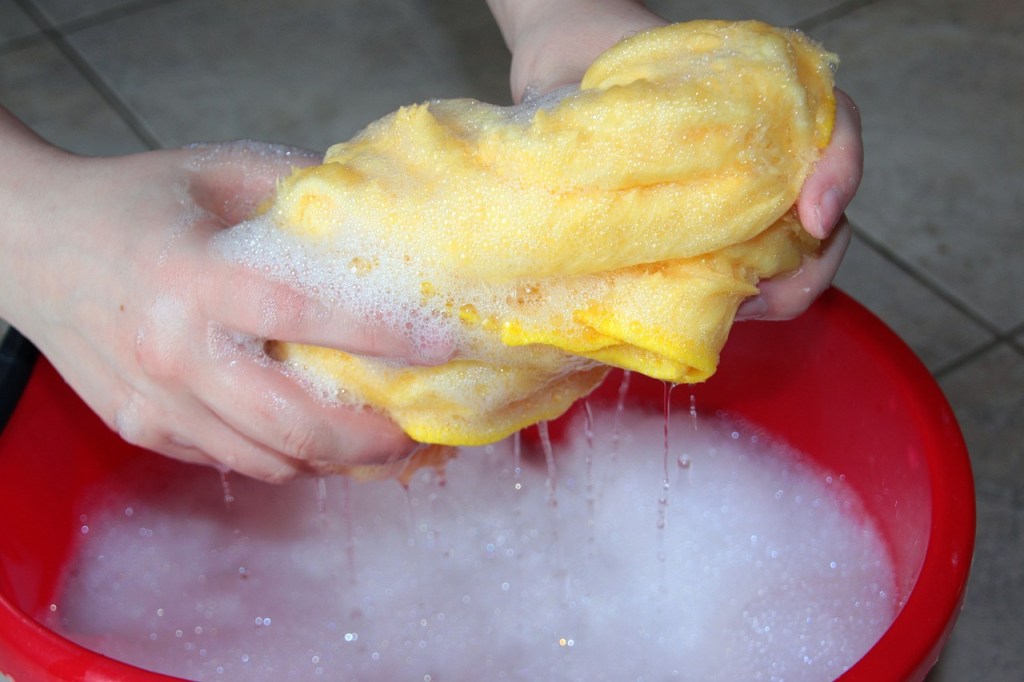
1. Final Degreasing Phase
Solvents, though effective, often leave an oily residue. This must be removed to prevent streaks.

  • Ideal Solution: A mix of warm water, white vinegar, and a few drops of mild dish soap. Vinegar acts as a natural degreaser, neutralizing oil or alcohol residues and combating limescale.

  • Process: Use a non-abrasive sponge soaked in this solution to wipe the entire area where the adhesive was.

2. Professional Drying Technique
The secret to an “invisible” finish isn’t in the product—it’s in the drying.

  • Rubber Squeegee: The professional’s essential tool.

  • “S” Motion: Instead of horizontal strokes, use a continuous zig-zag or “S” motion from the top of the window to the bottom without lifting the squeegee. This drags the water off without leaving streaks.

  • Squeegee Care: Wipe the rubber blade with a clean microfiber cloth after each full pass.

  • Microfiber Finishing: Use a dry, clean microfiber cloth to touch up corners and edges the squeegee can’t reach, moving quickly for a flawless final result.

Decorative Maintenance: Window Integration

Latest Posts Published

✨ How to Decorate a Windowless Room: 15 Surefire Strategies for Creating a Bright and Cozy Oasis

Introduction: Transforming Darkness into Potential Decorating a windowless room is often perceived as a challenge. The lack of natural light ...

How to Decorate a Narrow Hallway Without Overwhelming the Space: Complete Guide to Expanding and Modernizing It (2025)

Hallways are one of the most underrated areas of the house. They are often narrow, long, and poorly lit, making ...

How to Decorate a Small Bathroom with Functional Ideas: The Definitive Guide 2026

Decorating a small bathroom might seem like a challenge, but it is also an opportunity to turn a reduced space ...

How to Organize Your Kitchen to Make It Look Neat and Modern (Step-by-Step Guide)

The kitchen is one of the most used spaces in the home... and also one of the quickest to become ...

Wabi-Sabi Decor 2025: How to Create Imperfect Yet Elegant Spaces

Wabi-Sabi decor has positioned itself as one of the most influential trends of 2025. In a context where stress, visual ...

How to Choose the Perfect Lighting for Every Room

The Ultimate Guide to Home Lighting Design ✨ Lighting is one of the most crucial elements in interior design, often ...

DIY Decorating with Natural Wood: 15 Rustic and Modern Ideas

🪵 DIY Natural Wood Decor: 15 Rustic and Modern Ideas for Your Home In the era of fast consumption, the ...

How to Combine Maximalism and Minimalism in Interior Design (2025 Trends)

In the world of interior design, two opposing forces define the aesthetic landscape: the opulence and richness of Maximalism and ...

Sustainable Vintage Decor: Guide to a Trendy Retro-Style Home

Vintage decor has transcended the label of a "passing fad" to establish itself as a enduring philosophy of interior design ...

♻️ 10 Essential DIY Projects Using Recycled Materials to Renovate Your Home

The "Do It Yourself" (DIY) movement and sustainable decoration are not just passing trends, but an intelligent and conscious way ...

Leave a Reply

Tu dirección de correo electrónico no será publicada. Los campos obligatorios están marcados con *